The following actions can only be performed by an Admin user.
Enabling/Disabling Regions
To enable or disable regions simply head over to the settings page and do so from the Regions tab. Disabling regions requires no users to be assigned to any region.

Add, Edit and Delete Regions
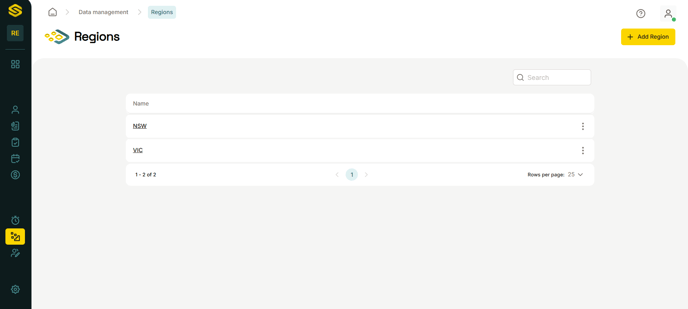
All these actions can be performed from the Regions data page which can be accessed from your data page. It will not be displayed if you have Regions disabled for your account.
Regions cannot be deleted if you have any users assigned to them.
When a region is deleted, all Customers belonging to that region will be removed from it.
Assigning a Customer to a Region
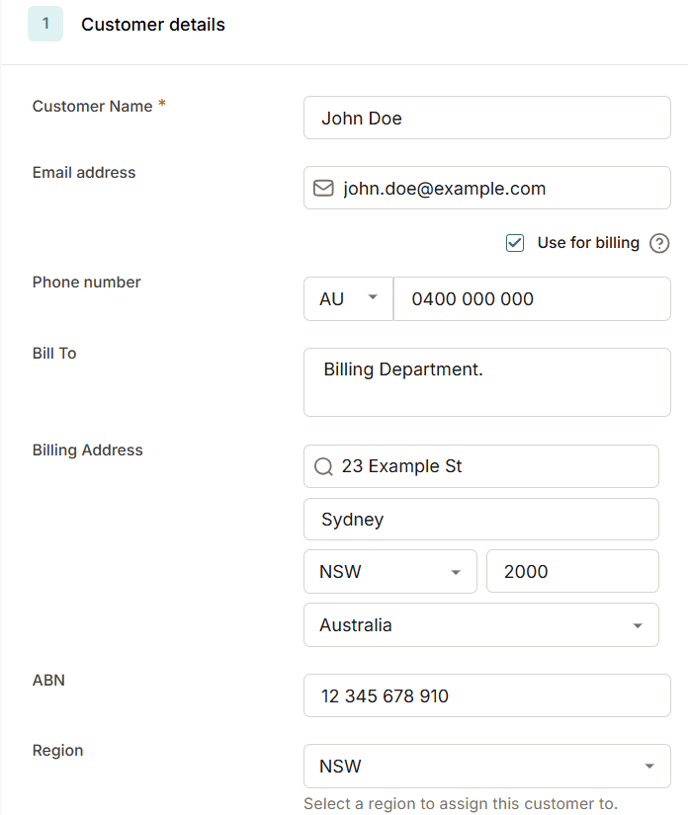
To assign a customer to a Region, you can do so from the create or edit customer action. After enabling and adding regions, you will be able to select a region for a customer whenever adding or editing.
Assigning a User to a Region
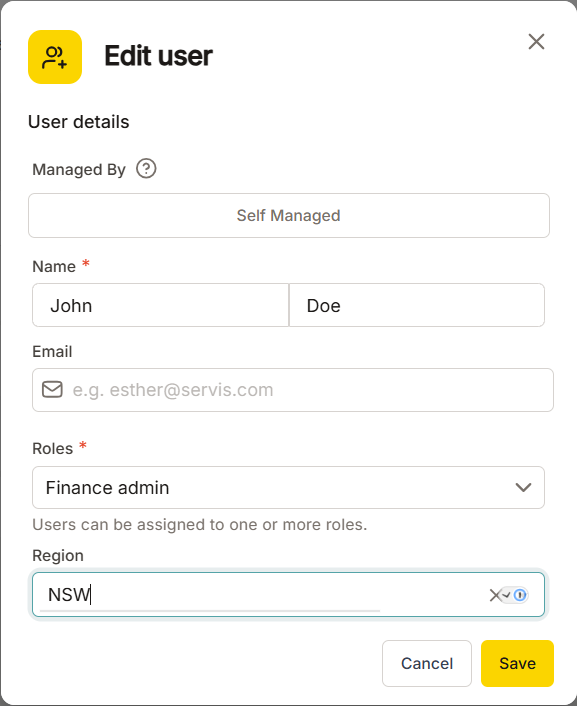
You can assign users to a region from the Edit user section. Admin users cannot be assigned to a region.
Notes
- Customers created by regionalized users will automatically be assigned to the same region as the creating user.
- Regionalized users will only be able to assign jobs to mobile users within their region.
- Admin users can assign jobs to any mobile user, whether they are regionalized or not.
Linking Regions to Xero Tracking categories
If you use Tracking categories in your Xero account and you've connected your Xero account to Servis, you can make use of the existing Tracking categories you've set on your customers to link them to regions in Servis.
Servis only tracks the "Sales" Xero Tracking categories you've set on your customers.
Assuming that you have all the requirements, you'll be presented with an option to link your Tracking categories to Regions in the Settings page and also in the Regions data page.

You can only link to a single Tracking category.
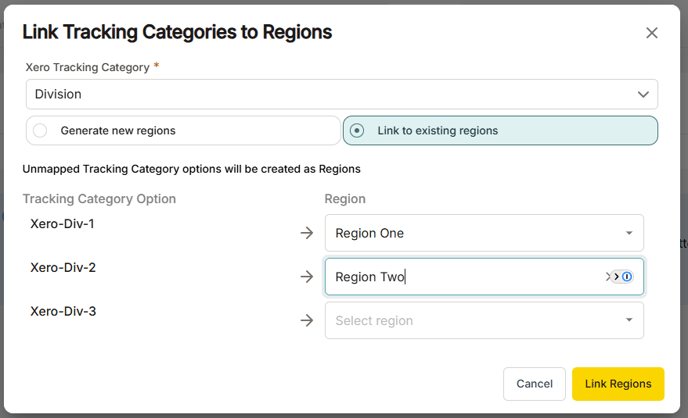
You have the option of generating new regions from your Tracking category options or linking them to existing Servis Regions.
Generating regions from your Tracking category options
This process is very straightforward, selecting this option will simply create a region for each option you have for the selected Tracking category. Any customer that is assigned to the original option will automatically be assigned to the newly generated region. The region will have the same name as the option.
 Ensure you have no existing regions with names identical to your Tracking category option name, otherwise this process will fail.
Linking Tracking category options to existing Regions.
This process is also relatively straightforward, you'll be presented with an option to link your Xero Tracking category options to your existing Servis regions. You can only link a single region to an option. Unlinked options will be created as regions in Servis, ensure you do not have an existing region with a name identical to any of the unlinked options, if you do, simply edit the name of the region before continuing. This is due to the fact that we enforce unique region names in Servis.
After linking, the tracking category option set on a customer will be determined by the linked region. If you're using two tracking categories, the unlinked category will function as per normal and can be set as you wish.
Unlinking Regions from Tracking categories.
You can unlink from the Regions tab in the settings page. Unlinking will remove any association between regions and the tracking category. Regions set on customers will remain unaffected. Disconnecting from Xero will also automatically unlink your regions.